World-building with Markdown
In this first part of a series about world-building markdown, I show you how to get started with MkDocs.

Introduction
In this guide, I’m going to show you how to create a world-building system based on Markdown. This will be a multi-part series. In this part, I’ll introduce the basics of Markdown and MkDocs, a static-site generator typically used by technical writers. I’ll cover how to install MkDocs, how to structure and write your project, and how to compile your project into a website for personal use or to share with others.
Note that throughout this guide I use macOS 11, however everything I’ll show you works with Linux and Microsoft Windows. As a special note for Windows users, if you enable the Windows Subsystem for Linux, and install Ubuntu from the Windows App Store, your experience will be just as good as using a Mac or Linux.
Why bother, when you can use xxx?
There are as many ways to build a world as people building them. Some need nothing more than a ring-binder, notebook, or a stack of index cards. Others leverage the power of word-processors, such as Microsoft Word or Google Docs. Those who want a digital solution with the analogue binder metaphor, use Scrivener. Others use wikis.
Then there are those who want a turn-key solution. None of the solutions I noted is dedicated to world-building and require some work to make them world-builder ready. For those who want a product that’s just for world-building, there are services like World Anvil and Camp Fire.
There’s no right or wrong way to world-build, nor has anyone created the perfect tool to do so. If you are satisfied with Scrivener, or World Anvil, or a bunch of Word docs, then certainly use it.
I built this method because I’ve tried just about every app or service available, and none suited my needs. I don’t like word-processors for writing technical content, which rules out Word, Google Docs and Scrivener. Furthermore, I don’t like proprietary databases that lock my content behind a paywall, which rules our World Anvil. I don’t like writing wiki syntax, which rules out a wiki-based solution like MediaWiki.
So, with my dealbreakers noted, I have a shopping list of requirements that I need in a world-building platform.
- Open-source. I need a system over which I have complete control.
- No databases. All content lives on my computer’s file system as plain-text, which leads to the next point.
- No proprietary document formats. All content is written in Markdown, using whatever tool takes my fancy.
- Single-source publishing. I need to be able to publish to multiple formats (PDF, web, ebook) from a single project source.
- Local/public. I need to build the project easily on my local computer or on a public webserver/jamstack hosting.
- Author/DM-only builds. I need to build separate versions for myself as author/DM, and for my readers, hiding certain aspects of my output as I deem necessary.
- Customisation. What I publish needs to look exactly how I want, using basic HTML, CSS, and JavaScript.
- Cloud or CVS backup. I need my content backed-up or managed in a cloud-syncing service like DropBox, or a CVS like Git. Plain-text documents and static images really shine here.
If only a few (or none) of these requirements appeal to you, then feel free to look elsewhere. My top pick for a commercial product to use for world-building is Scrivener: it’s low cost, has unparalleled organisational features and can build a great-looking PDF or ebook.
If you’re still with me, then let’s start with a look at Markdown.
What is Markdown
Markdown is a lightweight markup language designed for use by web writers who need an easy way to create HTML documents. Created by John Gruber, back in 2004, markdown has since become the de-facto standard for writing plain text and is supported across all major platforms.
Markdown's appeal is that it's simple, easy to learn, and indestructible. It requires no special tools to use, though there are dedicated apps (free and commercial) that can help make the experience of writing Markdown syntax even easier.
Chances are you've already used Markdown either purposefully or accidentally. Popular writing apps, Ulysses, Scrivener and iA Writer all support markdown. You'll also find it's used with modern blogging engines such as Ghost, and there are plugins that add support to the ubiquitous WordPress.
Even if you have never used these apps, or even heard of the term markdown before, you might have used it without even realising it. Have you ever created a bullet list with an asterisk or marked a heading with a # or emphasised text like *this*? Well, if so, you're primed to learn markdown!
# Heading 1
## Heading 2
### Heading 3
#### Heading 4

Markdown is natural, quick and effecient to write. According to it's creator, it was inspired by plain-text email.

Paragraphs are separated by two carriage returns. It supports **bold**, and _italic_ text, and using [hyperlinks](https://chrisrosser.net/codex).

Create lists usign an asterisks in a single line.

* list item
* list item

> Markdown is a text-to-HTML conversion tool for web writers. Markdown allows you to write using an easy-to-read, easy-to-write plain text format, then convert it to structurally valid XHTML (or HTML).

This is the basic syntax of markown, which you can learn in minutes. Other syntax features, like tables, definition lists, blocks etc are made available through markdown flavours, or extensions to the markdown compiler you've chosen.
Markdown is not a standard
One drawback, however, is Markdown lacks a general standard. There are several major flavours of Markdown that have implemented extensions to the origin syntax in different ways, these include:
- PHP Markdown Extra
- MultiMarkdown
- Python Markdown and extensions
- GitHub Flavoured Markdown
- Pandoc Markdown
Efforts to create a unified markdown standard, CommonMark hasn't really taken off. However, in my experience, the various dialects are interoperable, and the differences are slight. I think the benefits of using Markdown outweigh this minor inconvenience.
Throughout this guide, I’ll be using Python Markdown, with adheres closely to the original spec, while providing a vast add-on library of extensions to enrich your Markdown documents.
Choosing an editor
Since Markdown is just plain text, you can write in any text editor, including Text Edit on macOS and Notepad on Windows. However, you’ll get a much better writing experience using an app that supports Markdown syntax.
You could use Ulysses or Scrivener, which both support markdown…to a point. Ulysses uses a variant called MarkdownXL, which doesn’t support things like tables, and it abstracts away things like links and footnotes, hiding them from view. Scrivener meanwhile is more like a traditional word processor in that it encourages you to write in rich text, however, it does a pretty good job of exporting documents to markdown using the built-in MultiMarkdown compiler. You can also hijack Scrivener’s export features to use Pandoc instead.
My personal recommendation is VS Code, which is free, open-source, and can be customised into a plain-text publishing powerhouse with just a few extensions. VS Code has become my go-to app for writing raw Markdown documents. VS Code is available for macOS, Linux, and Windows.
For a more polished experience, I recommend iA Writer, which uses MultiMarkdown natively and has many features purpose-built for writers of long-form prose. I reviewed iA Writer 5 and 5.6 and concluded it’s almost the perfect app for technical writing, making it a strong contender for the faux-encyclopaedia writing we do as world-builders.
Finally, for those who prefer to work with the assurances of a cloud-based editor, I’d recommend Dillinger. While this might sound like a left-of-field recommendation, it has the advantage of being able to work with files stored in Dropbox, Google Drive, OneDrive, or GitHub/Bitbucket. If you store your documents in one of these services (and you really should), Dillinger lets you edit them anywhere. Even if it’s not your primary editor, Dillinger can be a great backstop for remote work, or if a catastrophic hardware failure or device theft occurs.
MkDocs
By itself, Markdown only takes us so far. To create our world-building codex, we need both a framework and a markdown compiler. I’ll be using a static-site generator, which converts a bunch of plain-text files into a website, that I can view locally or publish on a website.
There are countless static-site generators available, but most are intended to build blog-driven websites. For my purposes, I want a generator designed to build documentation, and the best I've found for Markdown is Mkdocs. I use this app in my day job as a technical writer, and so I can speak for its bullet-proof robustness and outstanding potential for customisation. With MkDocs as a foundation, you can build anything you can imagine, with the only limit being your design skills and what you can do with HTML.
Choosing MkDocs sets some basic conditions. MkDocs is built with the Python programming language and uses the Python Markdown dialect. It also specifies the basic structure of our documents, but this isn't onerous and is perfectly compatible with the world-building schema I use.
Workflow
The basic workflow is:
- Install MkDocs
- Create and configure your project
- Write your pages in the
docsdirectory. - Reference your pages in the config file.
- Serve your site to view it locally in your web browser
- Build your site to publish it online (optional)
You only need to do Steps 1 and 2 once, while 3-6 you’ll do in the ongoing process of creating and managing your world-building docs. Let’s start with the basics of installing MkDocs.
Installing MkDocs
To install MkDocs, you need Python3 on your computer. If you are using macOS 11 (Big Sur), or a recent release of Ubuntu (or any Linux distro), you have everything you need to start.
If you are using Microsoft Windows, you’ll have to install Python3. However, I recommend installing the Windows Subsystem for Linux and then install Ubuntu from the Windows Store. Snide remarks aside, this will turn your computer into a useful computer. If you took my advice and chose VS Code as your text editor, you’ll also find it works very well with WSL and is an incredibly capable Python development environment.
So, assuming you have Python3 installed, we can install MkDocs.
MkDocs provides a comprehensive installation guide using Pip, a package manager for Python.
The only thing I'd add to this is my recommendation of installing MkDocs using the Python virtual environment, especially on a Mac. This creates a local instance, separate from your system installation of Python. The reason I recommend this is that it keeps everything contained in your project, and allows you to use packages that might not be compatible with your system Python, which might be a little outdated.
Okay, so it’s time to open your Terminal and start working in the command line. Yes, I know this might terrify some writers/DMs, but seriously get over your fears and learn. First off, we’ll check to ensure Python3 is actually installed.
$ which python3
If we’re in business, we’ll get a response pointing to where the Python3 interpreter is installed. In my case, on macOS 11 that’s here:
/usr/local/bin/python3
Now I can create a project directory and install a Python virtual environment. I put mine in my Developer folder in my Home directory. You can put yours anywhere that’s meaningful to you, including DropBox if you want to keep it backed up and synchronised on the cloud. I put my Codex in a private Github repository.
$ cd ~/Developer
$ mkdir codex
$ cd codex
$ python3 -m venv venv
In the first line, I use the cd command to change to my Developer folder. In the second line, I use the mkdir command to make a new folder called codex; this is where our project will live. I then change into it in the third line, and finally, I use python3 to create a virtual environment. Note this command doesn’t return a response, but when the operation finishes, you’ll have a new subfolder called venv containing your virtual environment.
Let’s activate our new virtual environment.
$ source venv/bin/activate
Now, when I query where Python is with the which command, it will return the location relative to the venv directory.
$ which python3
/Users/christopher/Developer/test-codex/venv/bin/python3
With the virtual environment installed and active, we can safely install MkDocs using pip3.
$ pip3 install mkdocs
The terminal will spit out a bunch of lines and progress bars as MkDocs and its dependencies are installed. I can now use the which command to test if MkDocs is installed.
$ which mkdocs
/Users/christopher/Developer/test-codex/venv/bin/mkdocs
Next, we need to bootstrap, or initialise, our MkDocs project, which creates a basic skeleton with the essential files we need.
$ mkdocs new ./
INFO     -  Writing config file: ./mkdocs.yml
INFO     -  Writing initial docs: ./docs/index.md
The command created two new files, mkdocs.yml and /docs/index.md. The YAML file is where we configure MkDocs and set up our navigation. The docs directory is where we’ll write and keep all our documents, and the index.md file is our site’s home page.
To see how it looks, we can use MkDocs’ built-in webserver.
$ mkdocs serve
INFO     -  Building documentation...
INFO     -  Cleaning site directory
INFO     -  Documentation built in 0.06 seconds
INFO     -  [13:53:50] Serving on http://127.0.0.1:8000/
The serve command builds a temporary version of the site and makes it available into our browser at http://127.0.0.1:8000/

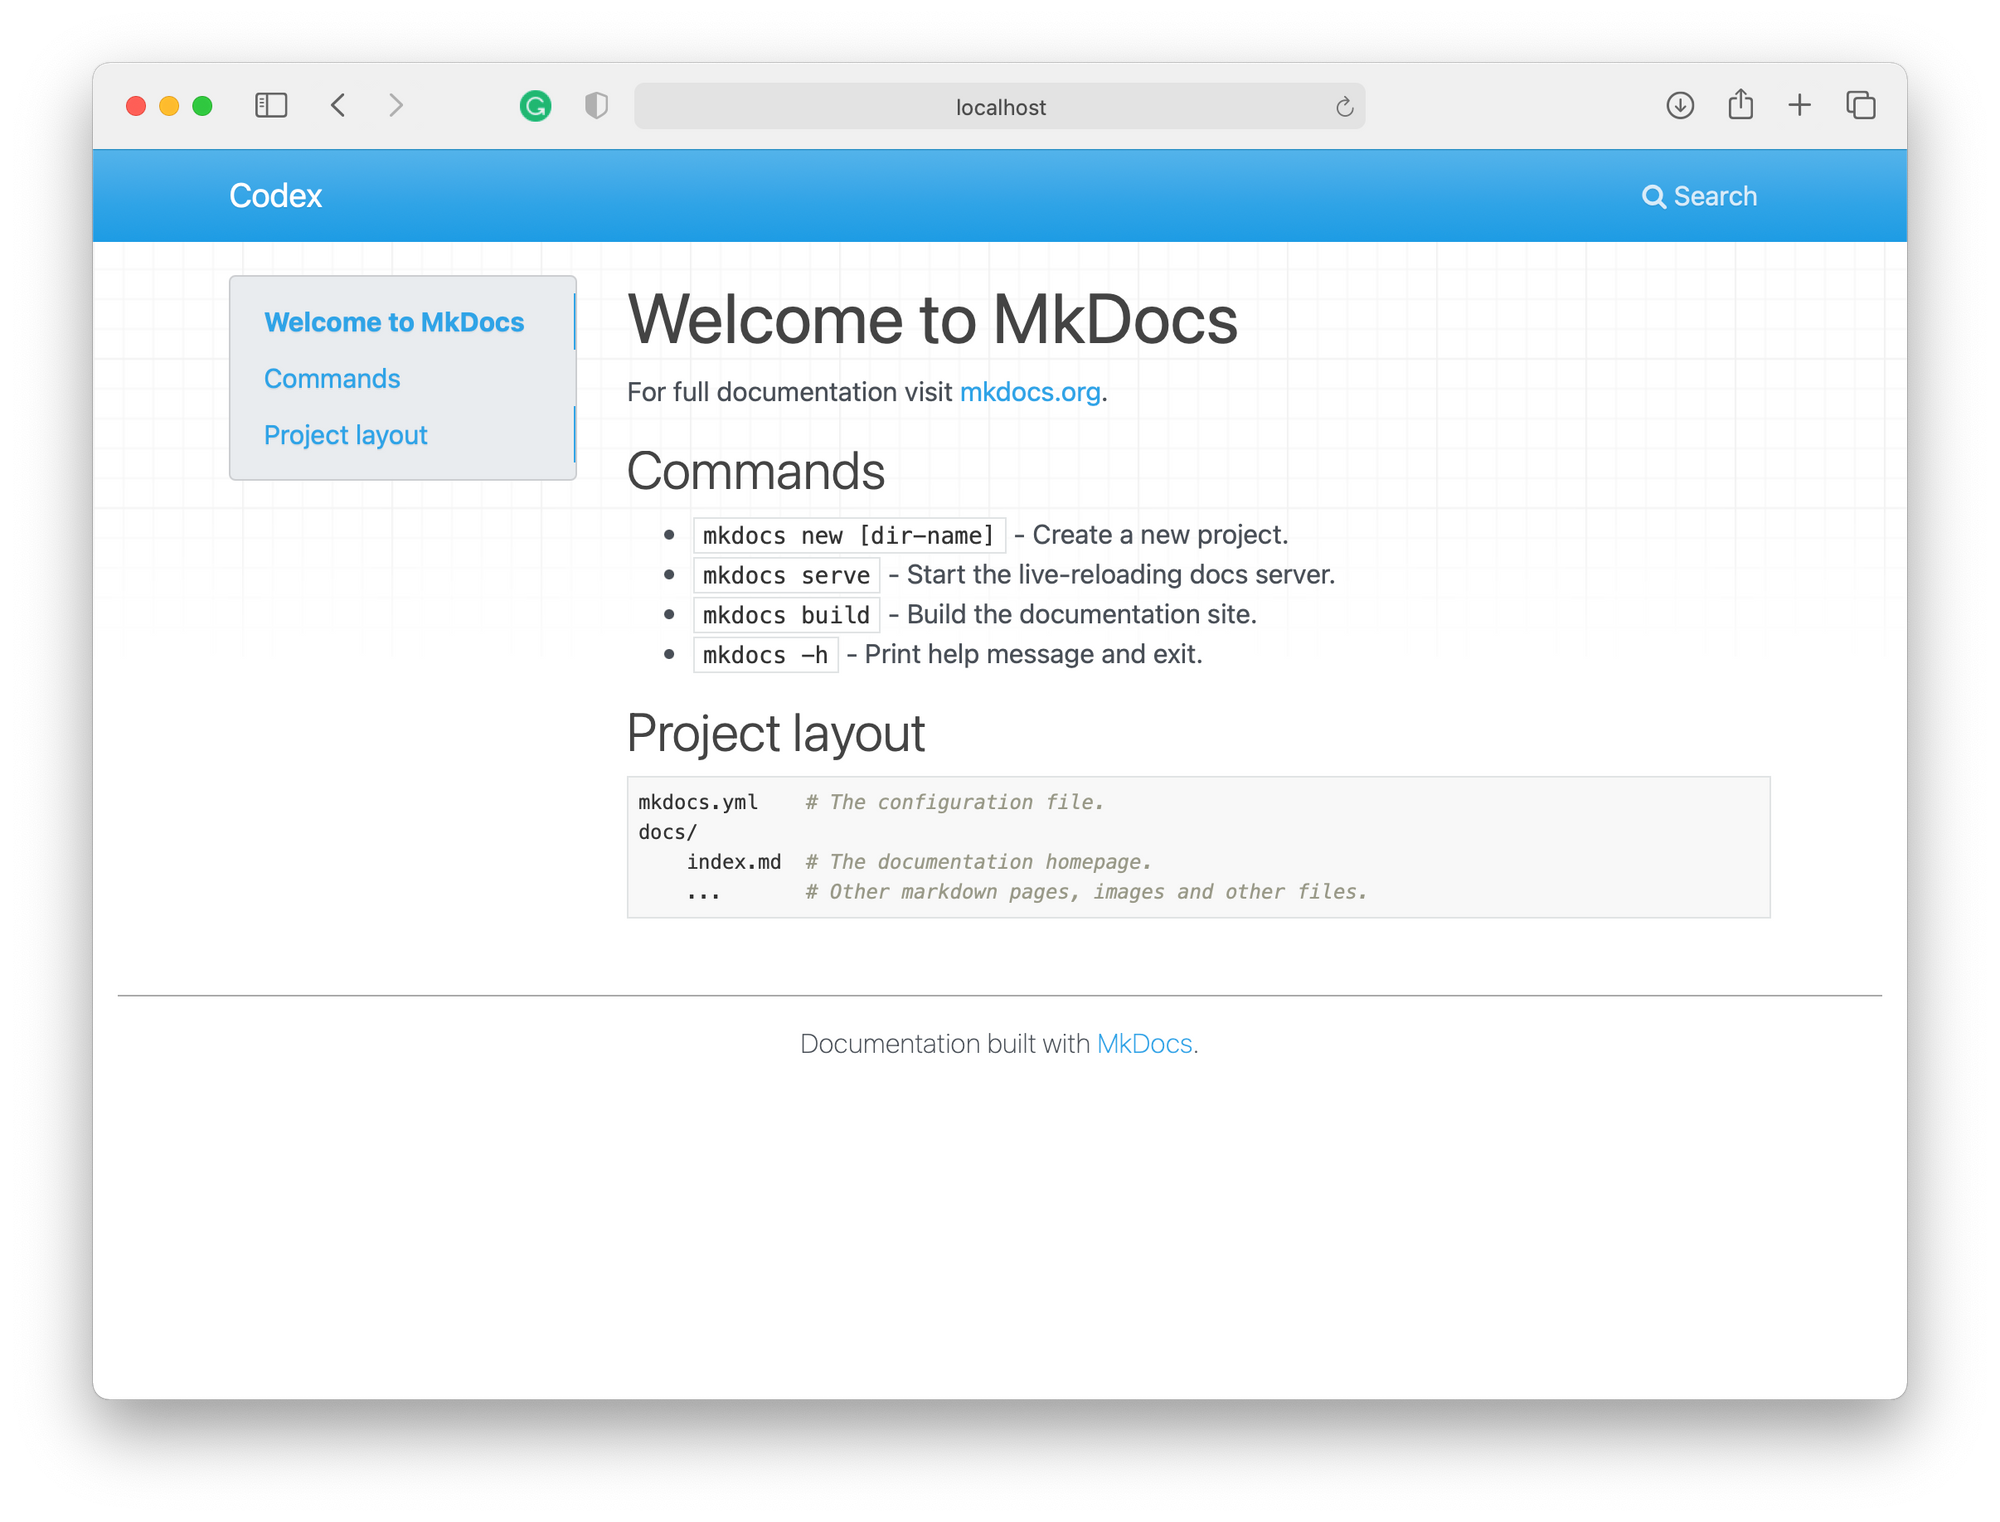
It’s not much to look at, but it’s the start of something majestic!
The page you’re looking at is the rendered HTML version of index.md, which contains some simple markdown.
# Welcome to MkDocs

For full documentation visit [mkdocs.org](https://www.mkdocs.org).

## Commands

* `mkdocs new [dir-name]` - Create a new project.
* `mkdocs serve` - Start the live-reloading docs server.
* `mkdocs build` - Build the documentation site.
* `mkdocs -h` - Print help message and exit.

## Project layout

    mkdocs.yml    # The configuration file.
    docs/
        index.md  # The documentation homepage.
        ...       # Other markdown pages, images and other files.
The navigation on the left comes from the documents heading structure, which is a pretty common feature in MkDocs themes (I’ll return to themes shortly). The site’s navigation is generated from a list contained in the project’s config file (mkdocs.yml). Let’s have a look at the config file.
site_name: My Docs
site_url: https://example.com/
At the moment it’s pretty sparse, with just the site’s name, and the URL. I’m going to change the name to Codex using a text editor. If mkdocs serve is still running, the site is automatically updated and rebuilt. Notice the change of name in the menu.
MkDocs themes
MkDocs has a couple of built-in themes, as I showed above, but I think you’ll agree they are rather bland. I’m going to replace the stock theme with Cinder, which, I think, would be a decent start for a sci-fi novel or RPG world.
Following the guide on the Cinder website, I’ll download the theme and install it in my project directory. You can do this manually in your browsers and file manager, but since I’m already in the Terminal, I’ll take the more direct path.
$ wget https://github.com/chrissimpkins/cinder/archive/v1.2.0.zip
$ unzip v1.2.0.zip
$ mv cinder-1.2.0 cinder
Now, I’ll edit my mkdocs.yml file to enable the theme.
site_name: Codex
site_url: http://localhost:8000
theme:
   name: null
   custom_dir: 'cinder/cinder'
Again, with mkdocs serve running our browser should automatically refresh with the Cinder theme active.
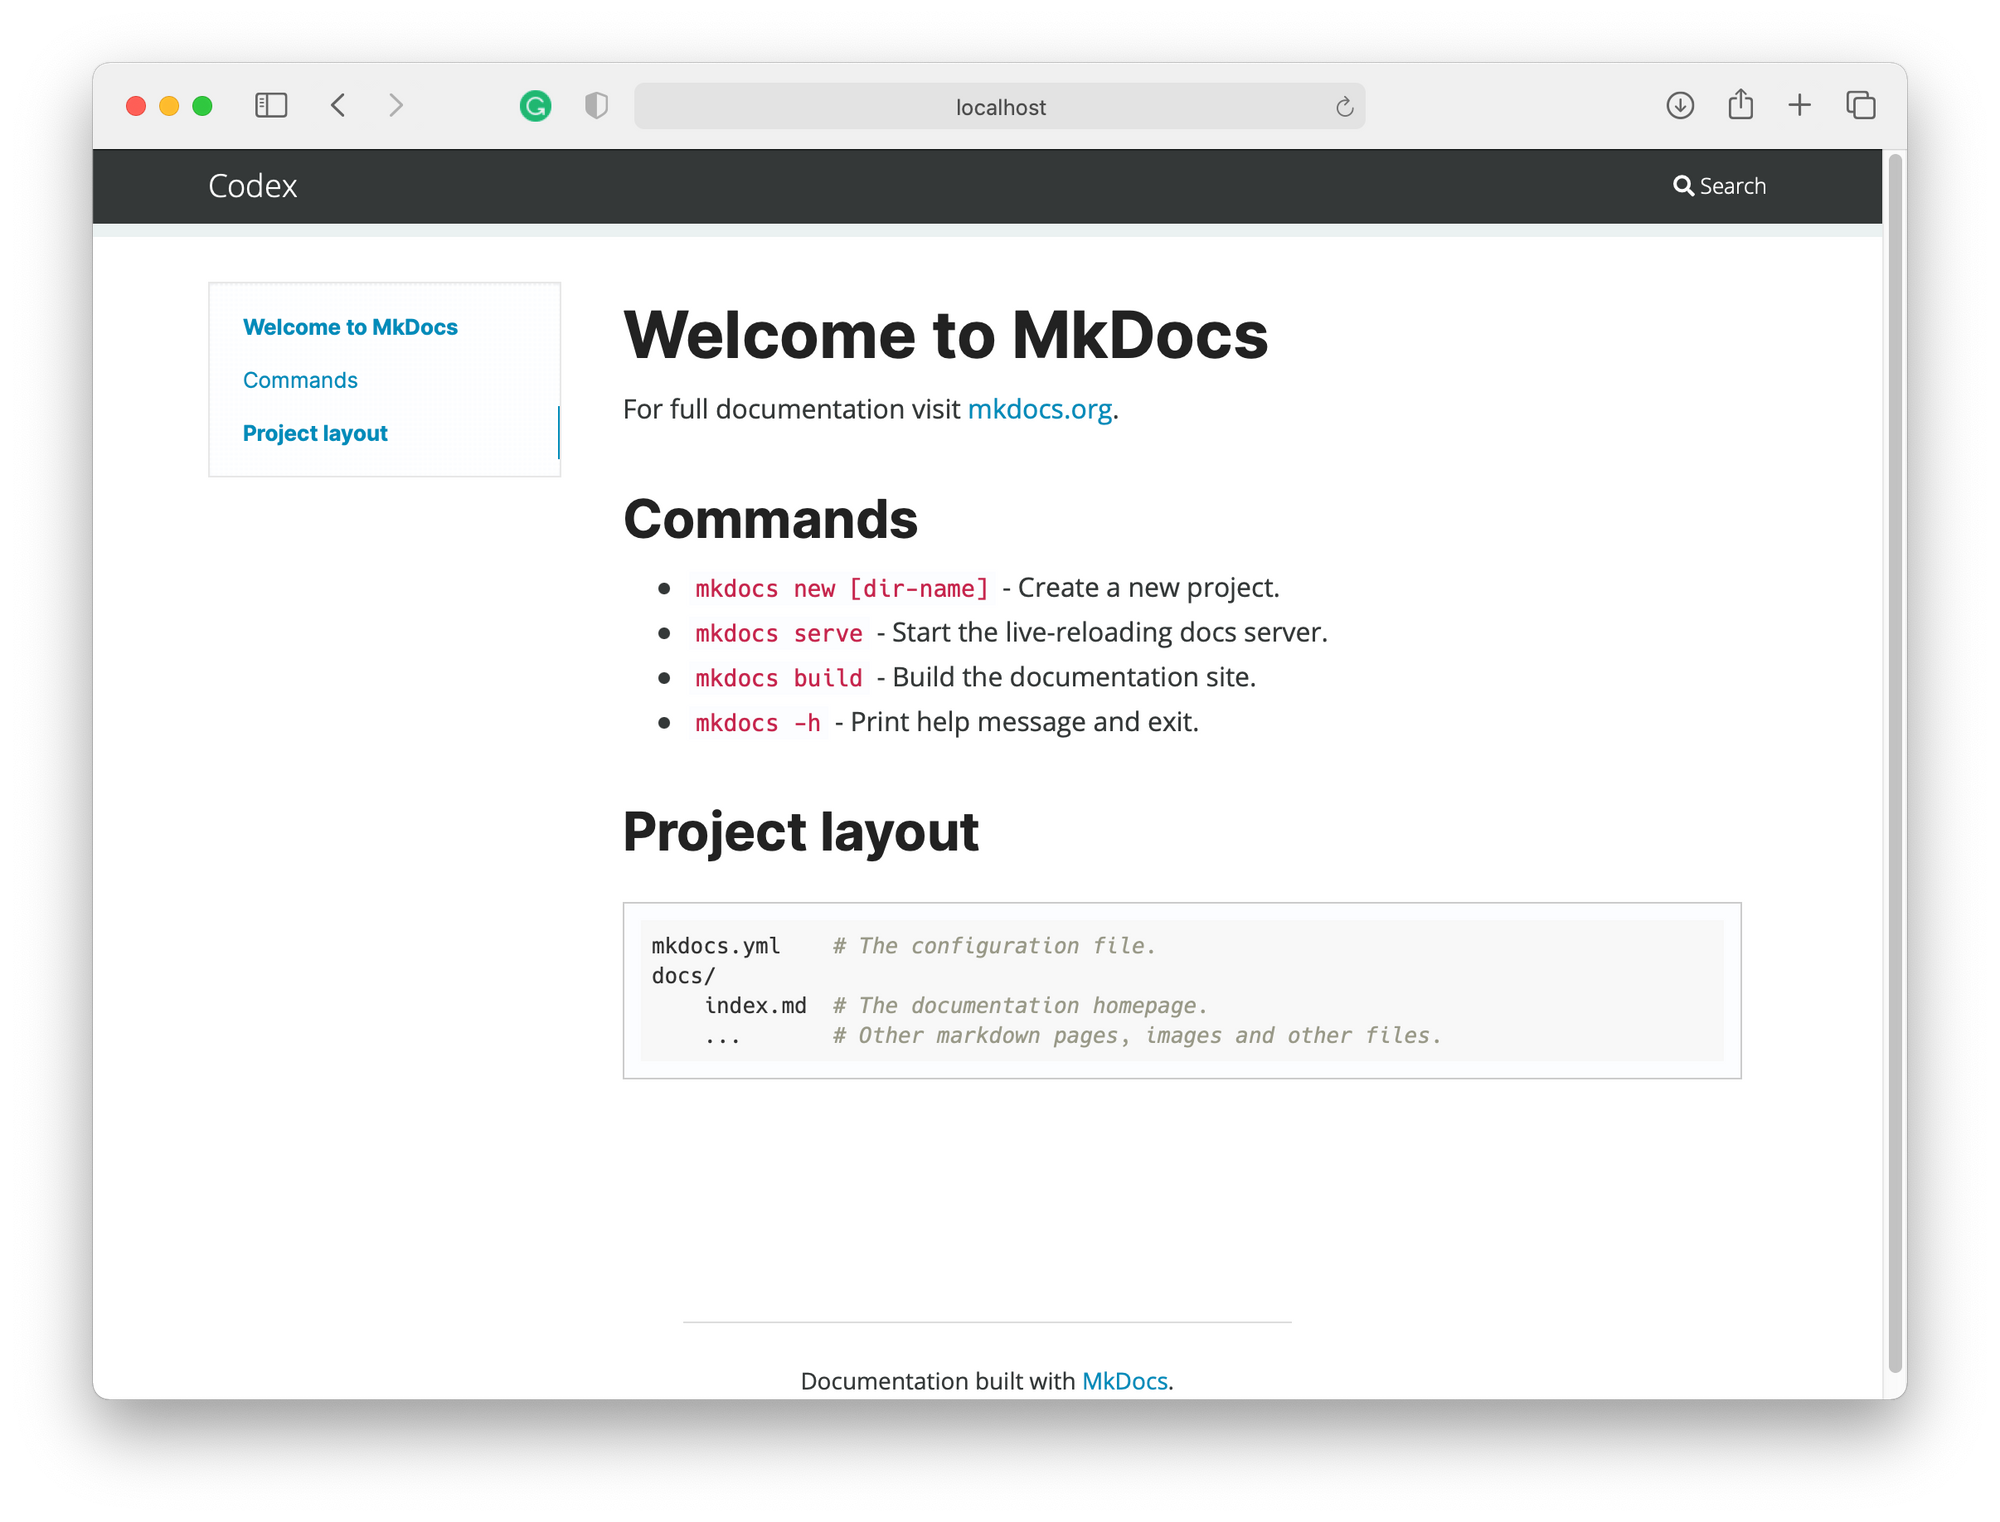
Cinder is based on the popular Bootstrap 3 CSS framework. If you are familiar with it, you can freely edit the theme as required. I’ll look at customising themes in another part of the series, but in brief, MkDocs uses HTML templates decorated with Jinja. Alter the templates, and the resulting site is modified accordingly.
With my Codex, I built the theme entirely from scratch, which I admit is a little excessive, but it gives me exactly what I want.
Creating content
With MkDocs installed and themed, we can start adding our content. As noted, we’ll write out documents in the docs folder within our project directory. Before we start writing, however, it’s a good idea to establish a basic structure.
Directory structure
This part is up to you, and what makes sense to your preferred way of world-building. MkDocs imposes no structure (which is one reason I love it), but that means the onus is on you to define and maintain it. How you structure your folders and directories is important because you must use that structure when linking between files. Choose something that’s so intuitive, you won’t have to think about it when writing links in your content.
For my project, I’ve adopted a fair simple structure that reflects a taxonomy I like. Here’s how it looks.
index.md
articles/
	artefacts/
		artefact.md
	history/
	magic/
	cosmology/
biographies/
	- character1.md
books/
	- book1.md
	- book2.md
geography/
	overview.md
	realms/
		- country1.md
		- country2.md
	regions/
		- region1.md
		- region2.md
	settlements/
		- settlement1.md
		- settlement2.md
images/
	maps/
		map1.png
organisations/
	political/
		- org.md
	guilds/
		- guild.md
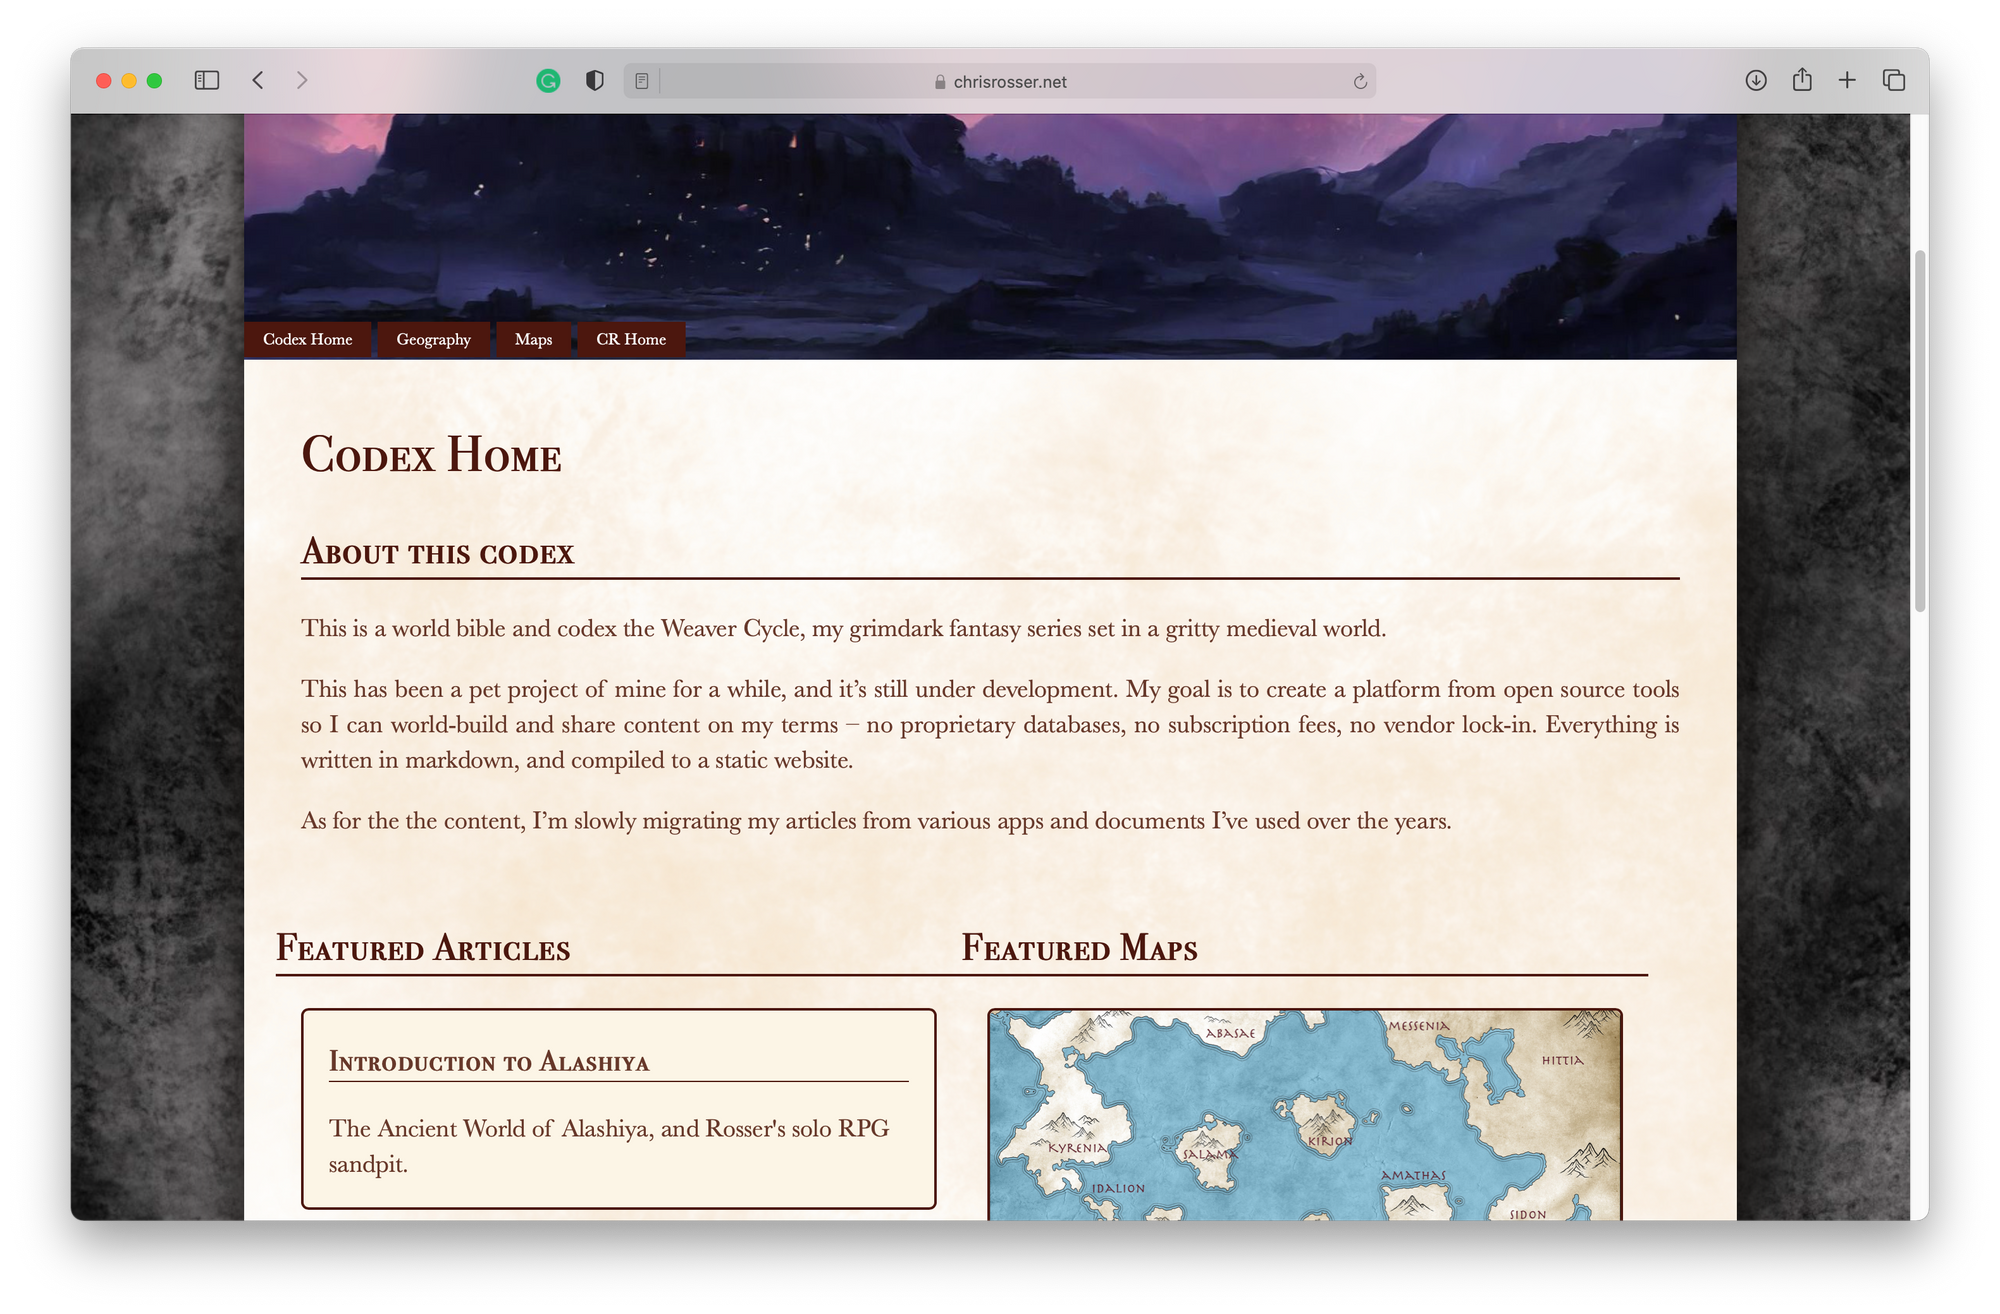
index.md is the site’s home page, part of which I showed in the screenshot above.
articles contains write-ups of everything in my world not related to a character or geography, such as artefacts, historical events (and timelines), my magic system, and cosmology. I like lumping these together, but if they have more prominence in your world, you find them more important, feel free to move them to the top-level folder.
biographies contains all the character sheets for my world’s major, minor and historical figures. If you’re a DM, you might prefer to call this folder npcs.
books contains a brief write-up of my published and unpublished books and stories. If you’re a DM, you might include a campaigns or adventures folder instead.
geography contains the bulk of my world-building files, the encyclopaedic dumping ground and certainly the largest amount of content. I break realms (countries), regions and settlements into separate folders, but you could just as easily nest them by doing something like this:
geography/
	contintent/
		region/
			realm/
				settlements/
images contains the image files I like to include in my documents. I’ve only shown maps which is the most obvious for world-building. However, the folder also contains the banners and backgrounds I use in my custom theme.
Finally, organisations include the articles about my world’s political, economic, religious groups, cults etc. A Dungeon Master, would probably refer to these as factions.
So, that’s the system I use. I can’t imagine anyone adopting it, since we all world-build differently, but it shows the flexibility of MkDocs. Again, it will handle any scheme you want, so go create one that suits your brain.
Creating articles
With a directory structure in place, you are now free to write your documents using Markdown syntax. Each document you create becomes a page in your site, organised through your site’s navigation (see below).
There’s not really much to say about this…just get writing and fleshing out your world.
Creating navigation
The nav element in your mkdocs.yml determines your site’s main navigation. You define your navigation structure using a simple yaml list. In my theme, I keep things pretty lean — only providing links to each top-level element. Some themes support nested navigation, others do not. If you want to use nested navigation and your theme doesn’t support it, you’ll have to add it yourself by editing the theme’s templates.
For reference, this is what my Codex’s navigation looks like.
nav:
  - Codex Home: 'index.md'
  - Biographies: 'biographies/overview.md'
  - Geography: 'geography/overview.md'
  - Organisations: 'organisations/overivew.md'
  - Articles: 'articles/overview.md'
  - Maps: 'geography/maps.md'
  - CR Home: https://chrisrosser.net
A couple of things to note. The overview.md files act as my introduction to each section and provide an index. For those who have visited my codex, you’ll note that some of those headings aren’t available to you. This is because I currently exclude those sections from the public version of the codex — more on that in a later tutorial.
Publishing your site
With some content added, you can begin building and optionally publishing your documents to the web. We’ve already demonstrated the built-in server, which is great for development and testing. But when it comes to publishing your site on a proper server, we need to build our site.
$ mkdocs build
INFO     -  Cleaning site directory
INFO     -  Building documentation to directory:
            /Users/christopher/Developer/test-codex/site
INFO     -  Documentation built in 0.11 seconds
The build command takes all our source files (markdown files and images) and compiles them to a website in the site directory. To publish these files, all you then need to do is upload them to your web server using your preferred FTP utility or with terminal commands, such as rsync.
Alternatively, you can get your site hosted free via a JamStack service such as GitHub pages, or Netlify. This is beyond the scope of this tutorial, however, but if you are interested, do let me know, and I’ll address this option in a later part of the series.
Concluding thoughts
MkDocs is a powerful publishing system; one that can be customised in any conceivable way. At work, as a technical writer, I use it to write API documentation. In my creative life as a novelist, it’s what I use to build my fantasy setting and share it with the members of my site.
In the introductory tutorial, I’ve shown the basics in how to install MkDocs, add a theme and start creating your content. The basics barely scratch the surface of what this open-source publishing platform is capable of.
In the next part, I’ll explore ways to customise a MkDocs theme for world-building. If you have a particular need you’d like addressed, do let me know, and I’ll try to cover it. I can make this series as long (or short) as interest dictates, so do reach out.
If you liked this article and want to support me, consider becoming a premium member. Premium members will shortly get access to my private GitHub repo where I’m building my Codec’s custom theme and will get access to a sci-fi version I’ll build once I’ve finished the fantasy theme.