Character Templates and Management in Scrivener
Expanding my novella to a full-length novel means I have to get serious about managing my characters. I update my old character bio template from their original markdown versions, and import it into Scrivener.

Tl;dr You can download the template to use or hack as needed. The Zip bundle includes the template in Microsoft Word, Rich Text, Apple Pages and Markdown format.
When I wrote my first two novellas, the scope of the story was small enough that I could juggle the characters in my head. Now that I've decided to rewrite The Weaver's Boy as a full-length novel, I need something a little more robust. However, the last time I wrote a novel was back in 2017, and that was a modern techno-thriller. I decided it was time I updated my character templates, both to reflect the different genre, and the way I know approach character design.
My original template was in markdown, leftover from the bleak two-year period when I wrote exclusively in Linux. I decided to keep the original document in markdown format, but then use a word processor to style it. Scrivener's rich-text controls (especially for tables) aren't great, but the app does a pretty good job of importing a formatted word document. Since I don't own Microsoft Word, however, I did the formatting in Apple's Pages app.
Summaries, conflict and change
Front and centre, I create a summary page to highlight all the essential ingredients of writing character-based fiction. Apart from their name, I note their role in the story, position in society and their goal and motivation. Critically for me, I also detail the character's conflicts and change.
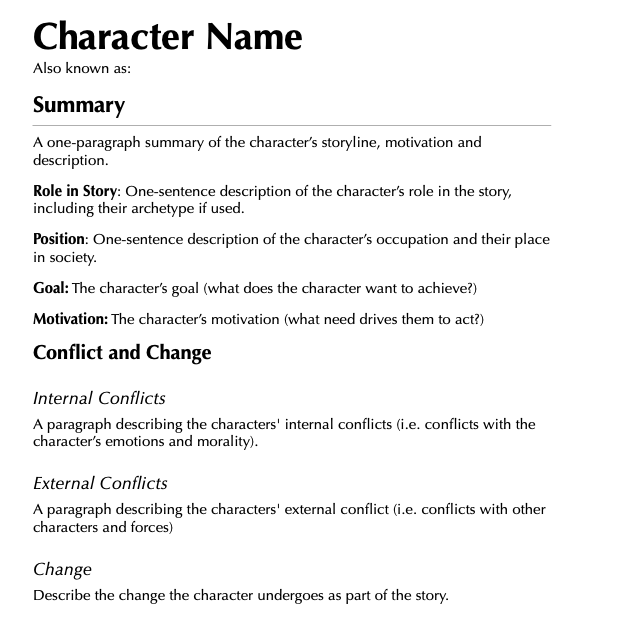
Not all characters have to change, and for minor characters without their own subplot and ark, I'll modify this section noting only how they relate to the central characters. For example, are they aligned to the protagonist, antagonist, or are they neutral in the central conflict.
Initially, I included a placeholder for a character portrait. Since the aim is to import the document into Scrivener, I won't bother. You can add pictures to a document's synopsis field and have them displayed in Scrivener's corkboard and inspector.
Reference tables
Next, I include a bunch of tables I use as a reference for the quantifiable traits of a character. Presented in tabular format, I find, is much quicker to parse than reading descriptions penned in prose.
In the first table, I capture the character's background information, place in society, when and where they were born and so on.

Next, I detail the character's physical appearance, and also note their health, fitness and so on.

Then it's on to the character's likes and dislikes. I break this down further to note how the character reacts to certain smells, colours, foods, and habits in other people.

Next, I map out the character's personality traits, using a sliding scale (1-10) between two extremes. I didn't come up with this method. Still, I find it invaluable as a reference for how a character will act when faced with various situations. The slider, or spectrum approach, reminds me to avoid creating characters lacking a broad emotional range, which tends to happen when you merely list a character's virtues and flaws.

You can also add an element of randomness if you find yourself creating characters with the same cliched traits time and again. A straightforward way to do this is to roll a D10 and see what you get.
Descriptions
Following the all-important summary and reference tables, I like fleshing out the details of important characters with some descriptive prose. I don't always do this, but I like having the option should the muse encourage me to do so. It can also serve to tease out the seemingly incidental but essential stuff, not captured by the boiled-down tabular format. For example, I can note down how a character acts in particular circumstances, like stress, boredom, grief or lust.
I can also play a bit with perspective, sometimes writing these descriptions from another POV.

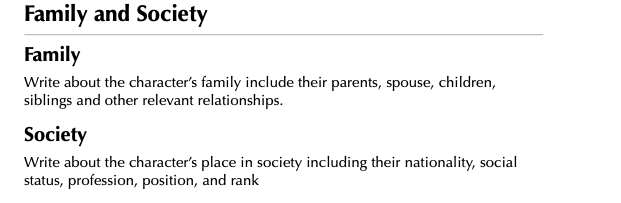
Likewise, I do the same for the character's family and their place in society. Here, I have the opportunity to flesh out the character's defining relationships, both during and leading up to the story.
In a similar step, I might also write the character's backstory — and for minor character's I typically merge this step with the previous one.

Sometimes, I'll also write a character synopsis, telling the story from the character's POV. Naturally, I usually do this with the central protagonist and antagonist. Still, in a complex story with lots of subplots, I might also do this for critical secondary characters.

Finally, my original template included headings for notes and scenes. In both instances, however, I prefer to use Scrivener's built-in features, Document Notes for capturing rough ideas about the characters, and Tags for noting where a character is mentioned.
Adding the template to Scrivener
Once designed, it's a simple matter for exporting the document to Word format, then dragging it into my Scrivener's project's Templates folder.
Thanks to Scrivener's robust support for the Word format, and the style system that shipped with Scrivener 3, the document translated quite well.
I had to perform a bit of minor clean up in Scrivener, which interpreted Page Break characters as a bunch of hard returns. It also added borders to my tables, which I didn't want. Oddly, the export process from Pages to Word changed my fonts from Optima to Times, presumably for compatibility with PC users.
Note that if you import as Rich Text, the format is pretty much perfect (even tables, fonts, and spacing); however, you will lose named styles.
In Scrivener, you have the option to chop up the template into separate documents, each representing a significant section. Time was I would have done this for structural purposes, but this time I've opted to keep the template as a single document for ease of use.
Here's how the template looks in Scrivener. I may tweak the design a bit as I use the template, but thanks to the styles manager in Scrivener 3, making and applying formatting changes throughout the project is trivial.

Note where the document lives in my nominated templates folder in the binder. To create a new character profile, all I have to do is right-click in my Codex, and follow the trail through the Add menu.

Concluding thoughts
Scrivener is unparalleled in its organisation power. Just as you can manage the complexities of a novel, so too can Scrivener help you manage the bits of the iceberg your readers don't see. Scrivener's templates and style engine also makes for a great experience when you want to ensure you can easily create (and recreate) collateral in a consistent format.
If you'd like a copy of my template, to use or hack as needed, download it using this link.